We have all been there. You are craving a thick, rich, bakery-quality treat, but a standard chocolate chip cookie just doesn’t hit the spot. You want something with crispy edges, a dense, chewy center, and a flavor profile that feels truly premium.
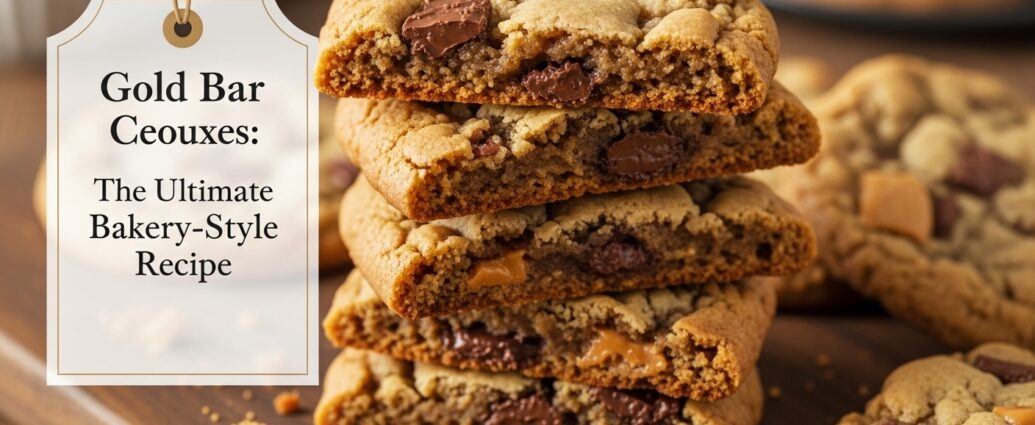
Enter the solution: **Gold Bar Deluxe Cookies**.
If you are tired of cookies that spread too thin or dry out in the oven, baking cookie bars is a game-changer. By pressing the dough into a single pan, you trap the moisture inside. The result is a luxurious, golden-brown dessert that looks and tastes like it came from an expensive artisan bakery.
In this guide, we will break down exactly how to make these decadent treats at home, the science behind the perfect chewy texture, and the baking mistakes you need to avoid.
Key Takeaways
Brown butter is essential: Toasting your butter adds a rich, caramel-like depth that regular melted butter cannot match.
Pan baking changes everything: Baking the dough in a single bar format prevents excessive spreading and keeps the center incredibly soft.
Patience pays off: Letting the bars cool completely before slicing ensures they set properly and hold their shape.
Quality matters: Using high-end chocolate blocks instead of standard chips creates melting pools of chocolate in every bite.
What Are Gold Bar Deluxe Cookies?
Gold Bar Deluxe Cookies are not your average drop cookies. They are thick, blonde-style cookie bars packed with premium ingredients. The “gold” refers to their perfect, golden-brown baked crust, often achieved by using a higher ratio of dark brown sugar and browned butter.
Unlike individual cookies that bake on a flat sheet, these are baked in a 9×9 or 8×8 square pan. This method drastically reduces the surface area exposed to the oven’s direct heat.
Because the dough is packed tightly together, the edges caramelize against the hot metal pan while the center remains slightly underbaked and gooey. Once cooled and sliced into thick, rectangular “gold bars,” you get a high-end dessert that feels heavy and indulgent.
The Star Ingredients You Need
To achieve a true “deluxe” status, you need to step away from the basic pantry staples. The quality of your ingredients will directly dictate the final taste.
1. Browned Butter (Liquid Gold)
You cannot make Gold Bar Deluxe Cookies without brown butter. When you melt butter on the stove and let it cook past the melting point, the milk solids begin to toast. This process creates a nutty, aromatic flavor that completely transforms the dough.
2. Dark Brown Sugar
White sugar provides crispy edges, but brown sugar provides the chew. For a deluxe cookie bar, use dark brown sugar instead of light. The extra molasses content adds a deeper toffee flavor and brings more moisture to the dough.
3. Chopped Chocolate Baking Blocks
Leave the standard chocolate chips on the grocery store shelf. Mass-produced chips contain stabilizers designed to help them hold their shape in the oven. For a luxurious texture, buy high-quality baking bars (around 60% to 70% cacao) and chop them by hand. The varying sizes will create massive, gooey pools of chocolate throughout the bars.
4. Flaky Sea Salt
A heavy, sweet dessert needs balance. Sprinkling a generous pinch of flaky sea salt over the top of the bars right when they come out of the oven cuts through the richness and enhances the chocolate flavor.
Step-by-Step Guide to Gold Bar Deluxe Cookies
Ready to bake? Follow this streamlined process to get the perfect texture every single time.
The Ingredient List:
– 1 cup unsalted butter (browned and cooled slightly)
– 1 ¼ cups dark brown sugar (packed)
– ½ cup granulated white sugar
– 2 large eggs + 1 egg yolk (room temperature)
– 1 tablespoon pure vanilla extract
– 2 ¼ cups all-purpose flour
– 1 teaspoon baking soda
– ½ teaspoon kosher salt
– 2 cups chopped premium dark chocolate
– Flaky sea salt for topping
Step 1: Brown the Butter
Place the unsalted butter in a saucepan over medium heat. Let it melt, stirring continuously. It will begin to foam and crackle. Watch closely. Once the crackling stops and you see small brown flecks forming at the bottom, remove it from the heat immediately. Pour it into a heat-safe bowl and let it cool for 15 minutes.
Step 2: Mix the Wet Ingredients
In a large mixing bowl, combine your cooled brown butter with the dark brown sugar and white sugar. Whisk them together until smooth. Add the whole eggs, the extra egg yolk, and the vanilla extract. The extra yolk is a bakery secret—it adds richness and guarantees a fudgy center.
Step 3: Fold in the Dry Ingredients
Add your flour, baking soda, and kosher salt to the wet mixture. Use a rubber spatula to gently fold the ingredients together. Stop mixing just before the flour entirely disappears. Overmixing will develop the gluten and make your bars tough instead of tender.
Step 4: Add the Chocolate
Pour in your chopped chocolate chunks, saving a small handful for later. Gently fold them into the dough.
Step 5: Press and Bake
Line a 9×9 baking pan with parchment paper, leaving an overhang on the sides for easy removal. Press the heavy cookie dough evenly into the pan. Press the remaining chocolate chunks into the top. Bake at 350°F (175°C) for 25 to 30 minutes. The edges should be golden brown, but the center will still look soft.
Common Mistakes to Avoid When Baking Cookie Bars
Even experienced bakers can run into issues with bar-style desserts. Here are the pitfalls to avoid.
Slicing Them While Hot
This is the most common mistake. When you pull these bars from the oven, the center is technically still baking from the residual heat. If you cut into them right away, they will fall apart into a gooey mess. You must let them sit in the pan for at least two hours before lifting them out by the parchment paper and slicing.
Skipping the Parchment Paper
Do not rely on cooking spray alone. The high sugar content in Gold Bar Deluxe Cookies makes them incredibly sticky. Lining the pan with parchment paper ensures you can lift the entire block out cleanly without leaving the bottom crust behind.
Using Cold Eggs
If you pour cold eggs into slightly warm brown butter, the butter will instantly seize and clump. Always let your eggs come to room temperature. You can do this quickly by placing the whole, uncracked eggs in a bowl of warm water for ten minutes before baking.
Storing and Freezing Your Deluxe Cookie Bars
These bars have an excellent shelf life because of their thickness and high moisture content.
Keep the sliced bars in an airtight container at room temperature. They will stay soft and fresh for up to five days. If you want to enjoy that fresh-out-of-the-oven experience on day three, simply microwave a bar for 10 seconds.
Can you freeze them? Absolutely. Wrap individual bars tightly in plastic wrap, then place them in a zip-top freezer bag. They will keep in the freezer for up to three months. Let them thaw at room temperature for a few hours before eating.
Conclusion
Baking the perfect dessert does not have to involve rolling out dozens of individual dough balls. By choosing to make Gold Bar Deluxe Cookies, you save time in the kitchen while actually upgrading the final result.
With the rich depth of brown butter, the gooey pockets of hand-chopped chocolate, and the undeniably perfect chewy center, this recipe will quickly become your go-to for parties, holidays, or just a Tuesday night craving. Grab your baking pan, source some good chocolate, and give this foolproof method a try.
FAQ Section
Why did my cookie bars sink in the middle?
A slight sink in the middle is actually normal and desired for a dense, fudgy texture. However, if they sank dramatically, you likely underbaked them, or your oven temperature was running too low. Make sure to use an oven thermometer to verify your baking temperature.
Can I make Gold Bar Deluxe Cookies gluten-free?
Yes. You can swap the all-purpose flour for a high-quality 1-to-1 gluten-free baking flour. Look for a blend that contains xanthan gum, as this will help the bars hold their structure and maintain their chewy texture.
Do I absolutely have to brown the butter?
While you can make this recipe with standard melted butter, skipping the browning process means you lose the signature “deluxe” flavor. Brown butter provides a toasted, toffee-like taste that makes these bars taste like they came from a professional bakery.
What size pan is best for this recipe?
A 9×9 inch square metal pan works best for thick, substantial bars. You can use an 8×8 pan, but the bars will be even thicker, requiring an extra 5 to 8 minutes of baking time. Avoid glass or ceramic pans if possible, as they conduct heat differently and can lead to overbaked edges with a raw center.