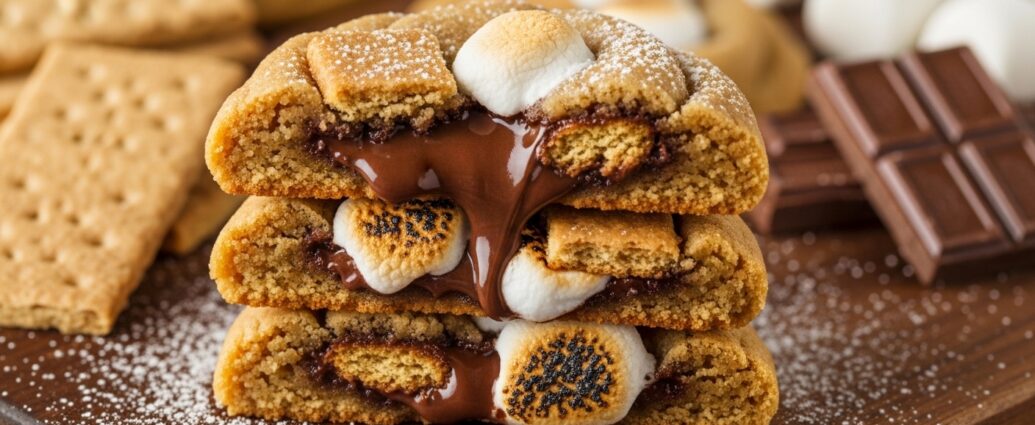
Craving campfire flavors? Learn how to bake the best gooey s’mores cookies loaded with toasted marshmallows, chocolate chunks, and graham crackers.
How to Make Perfect Gooey S’mores Cookies Every Time
Nothing beats the classic combination of melted chocolate, toasted marshmallows, and crunchy graham crackers. But setting up a campfire isn’t always an option when a sudden dessert craving hits.
If you are stuck indoors on a rainy afternoon or just want a cozy weekend treat, you need a reliable alternative. That is exactly why **gooey s’mores cookies** are the ultimate indoor dessert.
Many bakers try to make this treat by simply tossing mini marshmallows into regular chocolate chip cookie dough. The result? Hard, caramelized puddles of sugar instead of a soft, stretchy pull. Baking with marshmallows requires a specific technique to keep them soft and melty.
In this guide, gooey s’mores cookies, you will learn the exact steps, ingredients, and baking secrets to create bakery-style gooey s’mores cookies that look and taste incredible.
Key Takeaways
Chill your dough: Cold dough stops the cookies from spreading too thin in the oven.
Timing is everything: Add marshmallows near the end of the baking time so they toast instead of melting away.
Mix the chocolate: Use a combination of chocolate chips and chopped chocolate bars for the best texture.
Layer the graham crackers: Put graham cracker crumbs directly into the dough and leave larger chunks for the topping.
The Secret to the Best Gooey S’mores Cookies
Creating the perfect texture is a balancing act. You want crispy edges, a chewy center, and a marshmallow pull that stretches when you break the cookie in half.
The main challenge with baking s’mores cookies is how marshmallows react to heat. Marshmallows are essentially whipped sugar and gelatin. If you bake them for a full 12 to 15 minutes, they will melt completely, leak out of the cookie, and turn into hard, sticky candy on your baking sheet.
To prevent this, you need to use a sturdy brown-sugar dough base. Brown sugar contains molasses, which adds moisture and creates a chewy texture. You also need to control exactly when the marshmallows hit the heat.
Essential Ingredients for Maximum Flavor
To capture that authentic campfire taste, every ingredient needs to pull its weight. Here is what you need for your cookie dough.
1. The Graham Cracker Base
Standard cookie dough will not taste like a true s’more. You need to incorporate graham crackers directly into the batter.
Pulse a few sheets of graham crackers in a food processor until they turn into fine crumbs. Replace about a quarter cup of your regular all-purpose flour with these crumbs. This infuses the entire cookie with a honey-wheat flavor. Keep a few larger, broken pieces aside to press into the tops of the cookies later.
2. High-Quality Chocolate
If you want pools of melted chocolate, leave the standard chocolate chips in the pantry. Chocolate chips contain stabilizers designed to help them hold their shape when heated.
Instead, buy a high-quality semi-sweet chocolate bar and chop it into rough chunks. The varying sizes of the chocolate shards will melt beautifully, creating gooey chocolate puddles throughout the dough.
3. The Right Marshmallows
Mini marshmallows are your best friend here. Standard-sized marshmallows are too large and will overwhelm the cookie dough.
For the best results, freeze your mini marshmallows for about 30 minutes before mixing them into your dough. The freezing process slows down their melting rate in the oven, keeping them intact and gooey.
Step-by-Step Baking Instructions
Ready to bake? Follow these steps to get perfect results on your first try.
Step 1: Whisk the Dry Ingredients
In a medium bowl, whisk together your all-purpose flour, graham cracker crumbs, baking soda, and salt. Make sure the graham cracker crumbs are fine so they blend seamlessly with the flour. Set this bowl aside.
Step 2: Cream the Butter and Sugars
Using a stand mixer or a hand mixer, beat room-temperature unsalted butter with dark brown sugar and white sugar. Cream them together for about two to three minutes until the mixture is light and fluffy.
Add in a splash of pure vanilla extract and one room-temperature egg. Mix until just combined. Overmixing the eggs can add too much air to the dough, causing your cookies to deflate later.
Step 3: Combine and Fold
Slowly pour your dry ingredients into the wet mixture. Mix on a low speed until you see only a few streaks of flour remaining.
Turn off the mixer and use a silicone spatula to fold in your chopped chocolate chunks and a handful of frozen mini marshmallows.
Step 4: Chill the Dough
Do not skip this step. Scoop the dough into large balls (about three tablespoons each) and place them on a plate. Cover the plate with plastic wrap and chill in the fridge for at least one hour. Cold dough guarantees thick, bakery-style cookies.
Step 5: Bake and Top
Preheat your oven to 350°F (175°C) and line a baking sheet with parchment paper. Place the chilled dough balls a few inches apart.
Bake for 9 minutes. At this point, the cookies will look slightly underbaked. Pull the baking sheet out of the oven and carefully press 3 to 4 fresh mini marshmallows, a few chocolate chunks, and a piece of graham cracker directly onto the top of each cookie.
Return the pan to the oven for another 2 to 3 minutes. This perfectly toasts the marshmallows on top without dissolving them into the pan.
Common Mistakes to Avoid
Even experienced bakers run into trouble when working with marshmallows. Here are a few traps to avoid:
The Disappearing Marshmallow: As mentioned earlier, putting all your marshmallows inside the dough before baking often leads to empty cavities in your cookies. Always save some to press on top at the very end.
Skipping the Parchment Paper: Melted sugar is incredibly sticky. If you bake these directly on an unlined metal pan, you will be scraping them off with a chisel. Always use parchment paper or a silicone baking mat.
Overbaking the Dough: S’mores cookies should be soft and slightly doughy in the center. They will continue to bake on the hot baking tray even after you take them out of the oven. Remove them when the edges are golden, even if the center looks soft.
Storing and Reheating Your Cookies
These cookies are undeniably best served warm, right when the chocolate is melted and the marshmallows are stretchy. However, they store surprisingly well if you have leftovers.
Keep your completely cooled cookies in an airtight container at room temperature for up to four days. If you want to recreate that fresh-out-of-the-oven magic, simply pop a cookie in the microwave for 8 to 10 seconds. The marshmallow will puff right back up, and the chocolate will become wonderfully gooey again.
You can also freeze the baked cookies for up to three months. Just let them thaw on the counter for a few hours before eating.
Wrapping It Up
You do not need a campfire to enjoy the nostalgic flavors of a summer evening. By using the right mix of graham cracker crumbs, chopped chocolate, and strategically placed marshmallows, you can create a masterpiece in your own kitchen.
Take your time, chill your dough, and watch the oven closely during those final minutes. Your friends and family will be begging you for this recipe after their first bite.
Frequently Asked Questions (FAQs)
Can I use marshmallow fluff instead of whole marshmallows?
Yes, but it requires a different technique. You cannot mix fluff directly into the dough, or it will dissolve. Instead, you need to flatten a piece of cookie dough, add a teaspoon of fluff in the center, and wrap the dough completely around it before baking.
Why did my cookies spread completely flat?
This usually happens for two reasons: the butter was too warm when you mixed the dough, or you skipped the chilling step. Always use butter that is cool to the touch (not melting) and chill the dough balls for at least an hour.
Can I freeze the raw cookie dough?
Absolutely. Scoop the dough into balls and freeze them in a single layer. Once solid, transfer them to a freezer-safe bag. When you are ready to bake, you can put them straight into the oven from the freezer—just add one or two extra minutes to the baking time.
What is the best way to get a toasted marshmallow top?
If you want that slightly charred, golden-brown look on your marshmallows, you can use a kitchen torch right after the cookies come out of the oven. If you do not have a torch, switch your oven to the broiler setting for the final 60 seconds of baking, but watch them closely so they do not burn!